Nine-point calibration – commonly known as software-assisted manual calibration – aims to aid you in calibrating the printer for optimal performance through software adjustment. The goal is to produce the best possible print quality and allow for easy removal of support and raft structures. Of the three possible calibration methods, manual calibration provides the most effective outcome. Because its nine points cover the entire build plate area, the model is more likely to be perfectly printed. Tiertime recommends users to perform the nine-point calibration routine before the printer’s first print job and any time the printer has been moved to a new location.
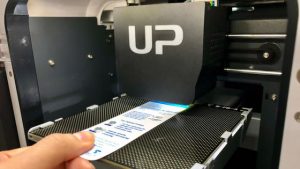
You will need either the calibration card which comes with some Tiertime printers or a single sheet of standard paper, which is approximately the same thickness. You will be using the card or paper to judge whether the nozzle is too close or too far from the build surface. During this operation, it is recommended for the printer to be located near the computer running Tiertime’s software because you will be switching back and forth between viewing the software and viewing the printer’s nozzle.
Open the software on your PC or laptop and initialize the printer. Click Calibration on the left sidebar menu, then choose Manual in the Calibration window, shown in figures 1 and 2 below.

Figure 1. Calibration Figure 2. Manual Calibration
Clicking the Manual button will raise the printer’s build plate to its starting position, its default height. The height value will appear in the Manual Calibration window, shown in Figure 2 as 115 for this demonstration. The default height varies for different printer models. UP BOX/UP BOX+ is 195, UP mini/UP mini 2 is 115 and UP Plus/UP Plus 2 is 125.
Place the calibration card or paper in between the nozzle and rear-left corner of the build plate, which is the first of the nine points to measure. Use the Up Arrow to raise the build plate until you feel resistance moving the card back and forth. It should not be difficult to move the card or paper, but there should be a slight tug from the nozzle pressing the card or paper against the build surface. The number reflected by your adjustments is the ideal height for that point. Click the Right Arrow to move the printer nozzle to next point and adjust that point’s height using the same method until you have completed the process for all nine points.
Figure 4. Finished all nine points Figure 5. Click Confirm
Click Confirm to save the height of all nine points. The software will set the lowest of the nine point’s height as the printer’s nozzle height. Click Confirm to save the nozzle height.
The manual calibration process is complete and you should be ready to print.